Exchange 2007 has continued to
improve upon its Anti Spam features with each version of the product.
In this article I want to focus on installing and configuring the
antispam agent on a hub transport server.
server is intended to be a down stream server behind an Exchange Edge
Server. Throughout the article you will see that some features can be
manged via EMC and a number of features must be managed via EMS.
Installing Anti Spam Agents
By default the Anti
Spam agents are not installed on the hub servers ***these must be
installed on each hub that you want to utilze the agents ****
Open EMC
Organizational Configuration
Select the Hub Transport Server

As you can see there is no reference to the anti spam agents
Lets go ahead and install the Agents"
1. Open EMS
2. you can change to the directory or input the path to the powershell script (I chose to change to the directory) Change to C:progroam filesMicrosoftExchange ServerScripts (assuming install directory is default)
3. ./install-AntiSpamAgents.ps1

After the agents are installed the Transport Service needs to be restarted
Lets go back to EMC–Organizational Configuration — Hub Transport
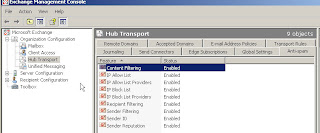
We now have an Anti Spam Tab with a number of items to configure
CONFIGURATION:
Now that we have installed our Anti Spam Agents lets take a look at
what we can configure. Some configuration can only be done from EMS and
some can be done from both EMS and EMC.
Content Filtering
IP Allow List
IP Allow List Providers
IP Block List
IP Block List Providers
Recpient Filtering
Sender Filtering
Sender ID
Sender Reputation
Content Filtering :
When the Content Filter agent is enabled on a computer, the Content
Filter agent filters all messages that come through all Receive
connectors on that computer. Only messages that come from external
sources are filtered. External sources are defined as non-authenticated
sources that are considered anonymous Internet sources.
http://technet.microsoft.com/en-us/library/bb124739.aspx
Content filter provides us with 3 tabs that we can configure
1. Custom Words
2. Exceptions
3. Action
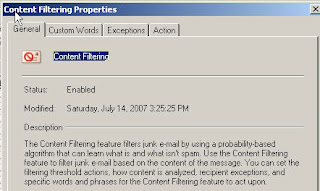
Lets first set a custom message to the users when a message is filtered, to do this you use the the set-contentfilterconfig command
Set-Contentfilterconfig -rejectionresponse "Your message was rejected due to content it contained"

Custom Words
This options allows us to configure 2 options 1: Messages with certain words will not be blocked and 2. Messages containing works or phrases to block.
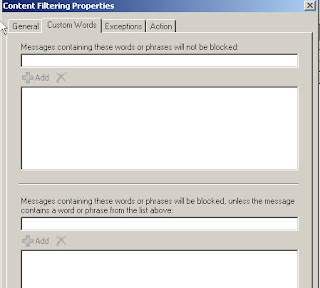
Lets perform some Tests:
1. Add a word to by pass our content filter
2. Add a word/phrase to block the message
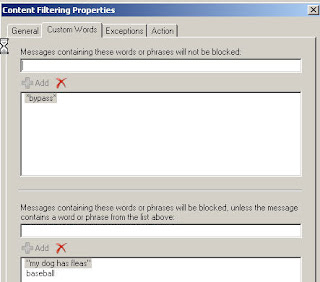
I have created 2 new rules:
1. b ypass will exempt a message from being filtered
2. baseball or "my dog has fleas " will be blocked
Since Content filter is only done for remote domains I setup a 2nd Exchange Org remote.local for the my tests.
Test:
Send Message From [email protected] to [email protected] with Baseball to catch the message
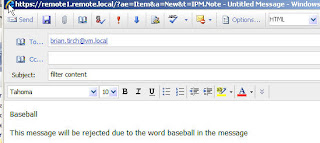
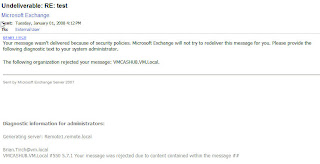
Result:
The Sender [email protected] receives Error message stating message is restricted, we can see our custom error message towards the bottom of the message.
Test2: Send Messge From [email protected] to [email protected] with bypass to bypass the content filter
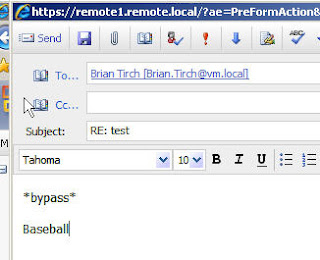
Result: Message was receieved by Brian
Exceptions
We have the ability to let users or groups by pass the content filter, this would be good for help desk mailboxes etc……
I have added [email protected] to the Exepctions
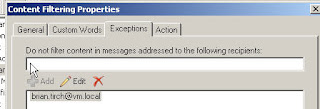
Test: Send message from [email protected] with baseball to [email protected]
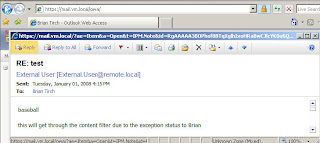
Result: The message was delivered and bypassed our content filter blocking the word b aseball
Action:
The Action tab alllows use to set thresholds to 1. Reject 2. Delete or 3. quarantine messag es
For this test I have set all message with SCL rating of 2 to be quarantined and [email protected] receive a copy.
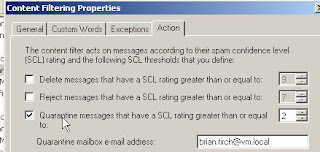
Test:
1. Removed Brian from the Exception
2. Sent message from [email protected] with spam like content
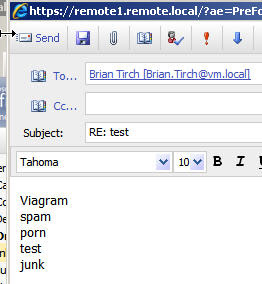
Result:
Message was captured by the content filter and a Quarantined version was sent to our spam mailbox.
I then released the message from our spam mailbox to the recipient which was delivered.
** To release a messsage from the spam mailbox you open the message and click send again **

IP Allow List
IP Allow lists are not configurable at the Org level, this is a server
level setting and we must look under server configuration -> Hub
transport to be able to configure this via EMC.
Lets use the Get-IPAllowListConfig to see what our default configuration is.
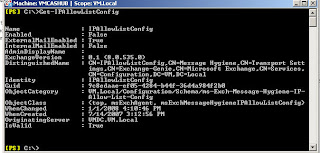
We can see that by default only filtering of external domains is
enabled, however this feature can be configured for internal and(or)
exteranl filtering.
To add a single IP or range of IP’s we would use Add-IPAllowListEntry command
Add-IPAllowListEntry -IPAddress 1.1.1.1
Any address or range added to your filter be bypass the content
filter that you have enabled. This would be good for any remote system
or new groups that are trusted or any smtp relays that are trusted.
After we have added the IP/Range we want to allow we can use the Get-IPAllowListEntry to view our configured systems.
http://technet.microsoft.com/en-us/library/bb123554.aspx
http://technet.microsoft.com/en-us/library/bb124385.aspx
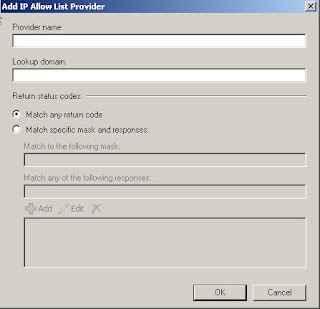
IP Allow List Providers
IP Allow list provider aka Save List Services can be manged via EMS or EMC
Lets look at the properties of the IP Allow List Providers
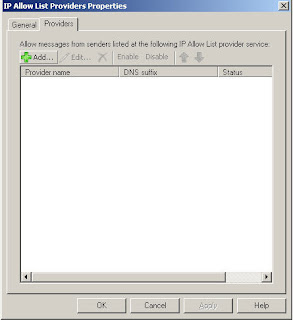
Provider name :Type the name of the IP Block List provider service. This name is for your own use
Lookup domain : type the domain name that the Connection Filter agent queries for updated IP Block list information.
Match to any return code When you select this
option, the Connection Filter agent treats any IP Address status code
that is returned by the IP Block List provider service as a match.
Match to the following mask When you select this option, the Connection
Filter agent acts only on messages that match the return status code of
127.0.0.x, where the integer x is any one of the following values:
1 The IP address is on an IP Block list.
2 The Simple Mail Transfer Protocol (SMTP) server is configured to act as an open relay.
4 The IP address supports a dial-up IP address.
Match to any of the following responses When you
select this option, the Connection Filter agent acts only on messages
that match the same IP address status code that is returned by the IP
Block List provider service.
IP Block List
IP Block Lists are the opposite of our allow lists, there are IP that
we want to block from sending messages to our Exchange environment. IP
block lists are not configurable at the Org level, this is a server
level setting and we must look under server configuration -> Hub
transport to be able to configure this via EMC.
We can use the Get-IPBlockListConfig to view our current
To modify our configuration we need to utlize the Set-IPBlockListConfig
http://technet.microsoft.com/en-us/library/bb123578.aspx
Lets create a custom response message for a blocked server:
[PS] C:>Set-IPBlockListConfig
-StaticEntryRejectionResponse "Your machine has been identified as
malicious and all messages will be rejected from your server".
Now lets add the IP address of our remote mail server to our block list:
Add-IpblockListEntry -IpAddress 192.168.1.120
Test:
Send a message from [email protected] to [email protected]
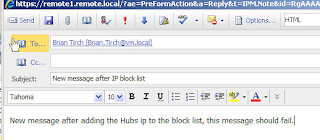
Result:
The Sender received an NDR with our custom message stating the server has been blocked
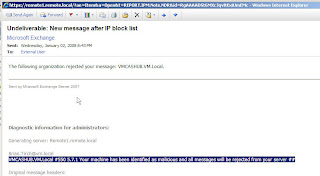
We can see that our message was reject by our content filter and our custom message was displayed.
IP Block List Providers
IP Block List Providers like Spam Haus http://www.spamhaus.org/index.lasso
have been around for a number of years and have compiled a list of
known spamers and can greatly assist Exchange Administrators by using
thier compiled list instead of manually blocking IP’s.
The agent can be managed from both EMS and EMC
On the properties of the agent we see the following
Let configure our server to use Spam haus as an Block List Provider
Select the Providers Tab and Click Add
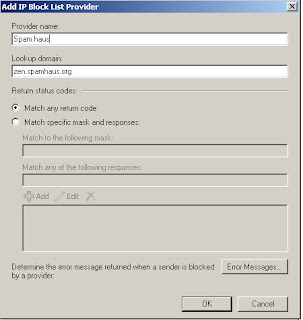
you can test to see if the SBL blocking is working by sending an
email (any email) to: [email protected] (you must send the
email from the mail server which you wish to test). The Crynwr system robot will answer you to tell you if your server is correctly blocking SBL-listed addresses or not.
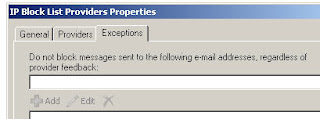
We can also configure Exceptions so that email sent TO a user are not blocked even if they are found to be from someone on the Block List.
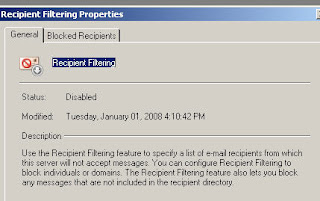
Recipient Filtering
Recipient Filtering allow the system to reject messages of users that
are not in your address book or you can block recipients that should
not be receiving mail from the outside.
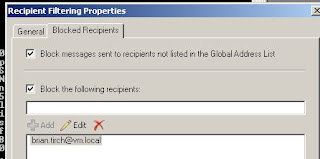
Lets look at our settings
1. check the box to block messages to recipients not listed in the GAL
2. We can block messages to specific users or groups
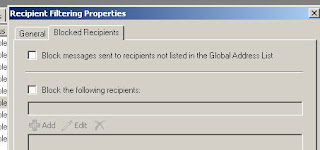
Test1:
I am going to add [email protected] as a blocked users, then send a message from [email protected]
Result:
Sender receives a 550 5.1.1 User unknown ##
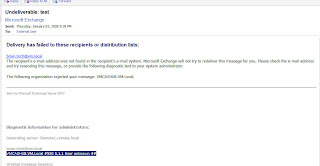
Test2:
With the block messages to recipients not listed in the GAL checked , I sent a message from [email protected] to [email protected]
Result:
Sender recieves a 550 5.1.1 User unknown ##
Test3:
With the block messages to recipients not listed in the GAL NOTchecked sent a message from [email protected] to [email protected]
Result
Sender recieves a #< #5.1.1 smtp;550 5.1.1 RESOLVER.ADR.RecipNotFound; not found> #SMTP# error
For more information on Recipient Filtering review the following
http://technet.microsoft.com/en-us/library/aa998898.aspx
Sender Filtering
Sender filtering compares the sender on the MAIL FROM: SMTP command to
an administrator-defined list of senders or sender domains that are
prohibited from sending messages to the organization to determine what
action, if any, to take on an inbound message.
Sender Filtering can be managed via EMC or EMS, lets look at the settings we have available
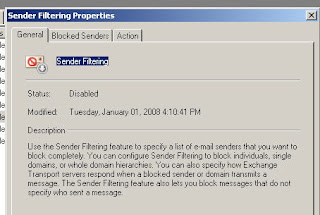
You can see we have 3 tabs
1. General – provides a description of what sender filtering does
2. Blocked Senders – allow us to block users,domains, or messages with blank sender fields
3. Action – allows the message to be rejected or stamped with blocked sender
Lets configure some settings
1.Add [email protected] as a blocked user and set the action to reject
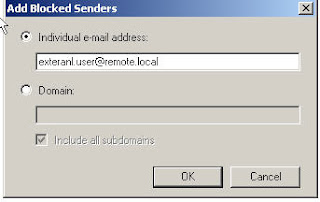
Test:
Send a message from [email protected] to [email protected]
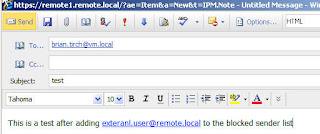
Result:
The sender receives and NDR #554 5.1.0 Sender denied ##
Now we have remove the individual user from the block list and added
the entire domain, for this test we will still leave the action to
block.
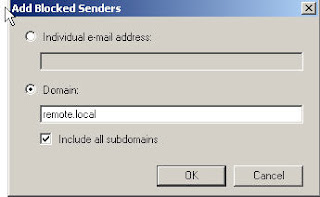
Test2:
send a message from [email protected] to [email protected]
Result:
The sender receives and NDR #554 5.1.0 Sender denied ##
I have left the domain block in place however this time changed the actions to stamp

Test3
send a message from [email protected] to [email protected]
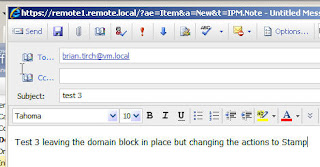
Result:
Message was received by [email protected] ….
"Stamp message with blocked sender and continue processing
If you select this option, messages from a sender or domain that is on
the Blocked Senders list are stamped with the blocked status and
continue to process. This message metadata is evaluated by the Content
Filter agent when a spam confidence level (SCL) is calculated.
Additionally, sender reputation uses the message metadata when it
calculates a sender reputation level (SRL) for the sender of the
message." http://technet.microsoft.com/en-us/library/aa997235.asp x
http://technet.microsoft.com/en-us/library/aa996031.aspx
http://technet.microsoft.com/en-us/library/aa996920.aspx
Sender ID
"The Sender ID Framework is an e-mail authentication technology
protocol that helps address the problem of spoofing and phishing by
verifying the domain name from which e-mail messages are sent. Sender
ID validates the origin of e-mail messages by verifying the IP address
of the sender against the alleged owner of the sending domain."
http://www.microsoft.com/mscorp/safety/technologies/senderid/default.mspx
http://www.microsoft.com/mscorp/safety/technologies/senderid/overview.mspx
Lets take a look at what options we have
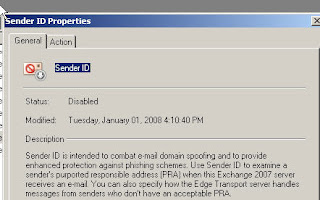
We have 2 tabs, general and actions
General: Gives an overview of what Sender ID does
Actions: Allow us to reject, delete, or Stamp message with sender ID result and continue to process
| Sender ID modes | Description |
| Stamp with result (default) | This option should be used if you want the Sender ID filter to stamp the validation results to the message and be processed by further anti-spam processing |
| Delete | This option should be used if you want the Sender ID filter to accept the mail and then delete it without sending the non-delivery report (NDR) to the user. |
| Reject | This option should be used if you want the Sender ID filter to reject the mail on the SMTP protocol level and issue an NDR message to the user. Specifically, the sending server is responsible for generating an NDR. |

