Introduction
Want to create a simple to use and beautiful blog with Ghost? Thanks to DigitalOcean’s one-click “application” installation, you can create a droplet with Ghost pre-installed, running and ready to go in just a few short minutes!
The instructions below will take you from zero to blog, but they do assume that you already have an account with DigitalOcean. If you haven’t, then head on over to the sign up page.
Step 1: Create a Ghost Droplet
In your DigitalOcean control panel, press the Create Droplet button, to be taken to the creation screen.
Droplet Hostname: You’ll first be asked for a “hostname” – this is the name of your Droplet so you can identify it if you have a few. The name should not contain any spaces or special characters.
Select Size: There are 6 size options, but the smallest 512MB should be plenty for the majority of blogs. If you run out of resources, you can always upgrade later.
Select Region: Choose the region closest to you, or to your target audience.
Select Image: This is the important part! Under ‘Select Image’ choose ‘Applications’ and then select ‘Ghost on Ubuntu 12.04’.

You’re nearly there! Hit the big green ‘Create Droplet’ button, and a new Droplet will be created for you, with all of the things you need to run Ghost – such as Node.js, nginx and including Ghost itself – already configured and setup.

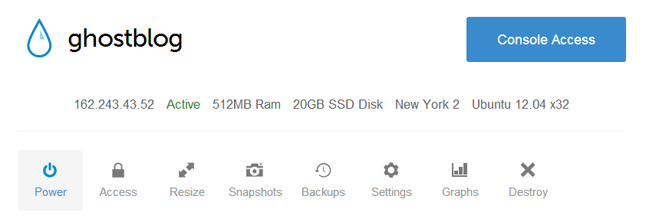
Once your Droplet is ready, you’ll see a screen like this one:

If you open the IP address – which is 162.243.43.52 in the example above – in your favourite browser, you’ll see your new Ghost blog is already up and running!
Step 2: Setting up a domain name
You now have your very own Ghost blog, but accessing it via an IP address probably isn’t what you want. There are 3 steps to setting up a custom domain.
- Change the nginx configuration to match your domain name.In your control panel, select your droplet, and choose ‘access’, then press the ‘Console Access’ button. Once your console loads you’ll need to log in. You should have received an email from DigitalOcean with the login details for your new droplet.
Type
nano /etc/nginx/sites-available/ghostto open the nginx config file for editing in thenano editor. Change the currentserver_namefrommy-ghost-blog.comto your domain name.
Note on using nano: Use the arrow keys to move the cursor around not the mouse. When you’re finished, press ctrl + x to exit. Nano will ask you if you want to save, type y for yes, and pressenter to save the file.
- Edit the Ghost configuration fileStill in the control panel, enter
nano /var/www/ghost/config.jsto open the Ghost configuration file for editing.The Ghost
config.jsfile contains configuration for different environments, your Droplet is automatically configured to run in production mode. Production mode comes second in the configuration file, after development mode. Move down the file until you find the production url setting, and change this to your domain name.
There are several other options in this file which can be configured, see the Ghost usage documentation for more information.
- You’ll need to follow DigitalOcean’s instructions on how to point your domain name at your server.
Step 3: Get Blogging
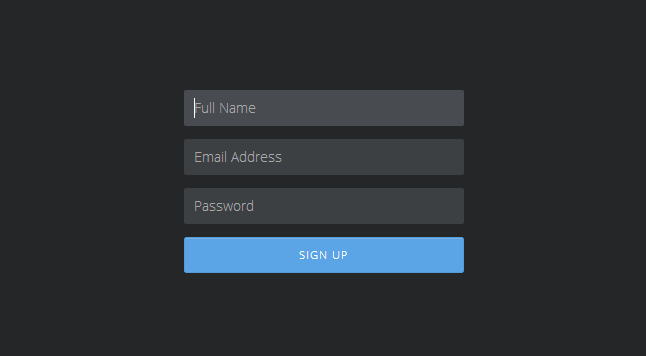
Browse to your newly configured blog, and then change the url to your-url/ghost. You’ll see the Ghost sign up screen. Enter your details to create your admin user account. You’ll be automatically logged in when you’re done.

Once you’ve logged in, you’ll be taken to the Ghost content screen. You’ll see a welcome blog post, and a green + button. Press that button to get started writing your first blog post in Ghost.
Maintaining your blog
You now have a fully working Ghost blog. Your Ghost Droplet is setup to make it as easy as possible to look after your blog in the long term.
Starting and stopping Ghost
Under certain situations, such as installing themes or upgrading, you may need to start, stop, or restart your Ghost blog. You can do this by using the start, stop and restart commands provided by the Ghost service. For example, after installing a theme, you can restart Ghost by typing service ghost restart. To see the current status of your Ghost blog just type service ghost status.
Upgrading Ghost (updated as of Ghost 0.4)
- First you’ll need to find out the URL of the latest Ghost version. It should be something like
http://ghost.org/zip/ghost-latest.zip. - Once you’ve got the URL for the latest version, in your Droplet console type
cd /var/www/to change directory to where the Ghost codebase lives. - Next, type
wget http://ghost.org/zip/ghost-latest.zip - Remove the old core directory by typing
rm -rf ghost/core - Unzip the archive with
unzip -uo ghost-latest.zip -d ghost - Make sure all of the files have the right permissions with
chown -R ghost:ghost ghost/* - Change into your Ghost directory with
cd ghost, then runnpm install --productionto get any new dependencies - Finally, restart Ghost so that the changes take effect using
service ghost restart
Conclusion
DigitalOcean’s one-click application feature (and the image created by Sebastian Gierlinger) makes it incredibly easy to get started blogging with Ghost.
This article details 3 steps, but Ghost is running and ready for you to add blog posts by the end of the first, head over to the Ghost Guide for more information on how to get the most out of Ghost.
We hope you enjoy blogging with Ghost, and continue to find maintaining your Ghost installation on DigitalOcean straightforward!
Original Article by Hannah Wolfe
