One of the steps in setting up your Zendesk is deciding how you want to configure end-user access. Based on the type of support you provide, you may allow anyone to submit support requests or you may limit it to a select group of users. You can configure Zendesk Support for either scenario.
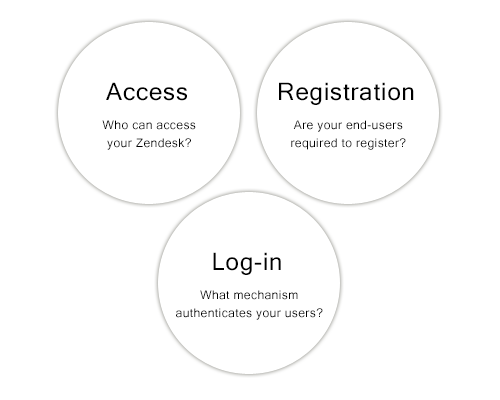
You’ll need to configure end-user access, registration, and sign-in options.

You have flexibility in all three of these areas, and the following sections explain each in detail.
Topics covered in this article:
Access
You have internal and external users. Your agents and other support staff are your internal users. Your end-users are the people to whom you provide support and whose tickets you manage in Zendesk Support. These are your external users. While your support staff must sign in to your Zendesk, your end-users may not have to depending on how you set up access to Zendesk Support.
You can set one authentication method for end-users and another method for agents and admins. For example, you can specify stricter password requirements for agents, who have access to more sensitive information, than for end-users. You can also provide different single sign-on options for each set of users.
You can also restrict the external users who can access your Zendesk Support instance. For example, you might want to allow only end-users from a specific email domain and then reject all others.
You can set up your Zendesk Support access to be completely open to all users, restrict it to a specific group or groups of users, or close your Zendesk Support instance and only allow the users you add to your Zendesk.
- Open means that everyone can see your Help Center and submit support requests. This is the configuration you’d choose if you, for example, sell products and provide support to the general public. A user submits a support request and a new user account is created in your Zendesk.
- Closed means your Help Center is visible to everyone but only the users that you add to your Zendesk account can sign in and submit support requests. Each user’s account must be created before they can submit support requests and signing in is required. This is typically how an in-house IT help desk would configure their Zendesk Support instance.
- Restricted means that your Zendesk Support instance is visible to all users but only users with email addresses in domains that you approve are able to successfully submit support requests. All other users’ requests are rejected. This configuration allows you restrict access to Zendesk Support but also allows your users to request support without first having been added to your Zendesk, as is the case with a closed Zendesk Support instance.
Setting up your Zendesk Support instance for all three options is described in the following topics:
- Enabling anyone to submit tickets (open)
- Permitting only added users to submit tickets (closed)
- Permitting only users with approved email addresses to submit tickets (restricted)
Registration
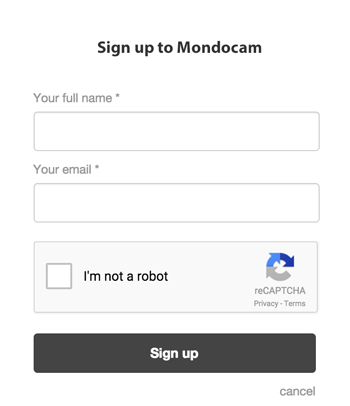
You can require that your end-users register before they can begin a conversation with your Zendesk Support instance. This means that users must first register (sign up) with your Zendesk by providing their name and email address.

Note: If you started using Zendesk Support on or after August 21, 2013, this option is not available until you activate your Help Center. See Getting started with Help Center.The registration process is started when an end-user does one of the following:
- Visits your Help Center and clicks Submit a request
- Visits your Help Center and clicks Sign in for the first time and then Sign up
- Sends an email support request to your support email address for the first time
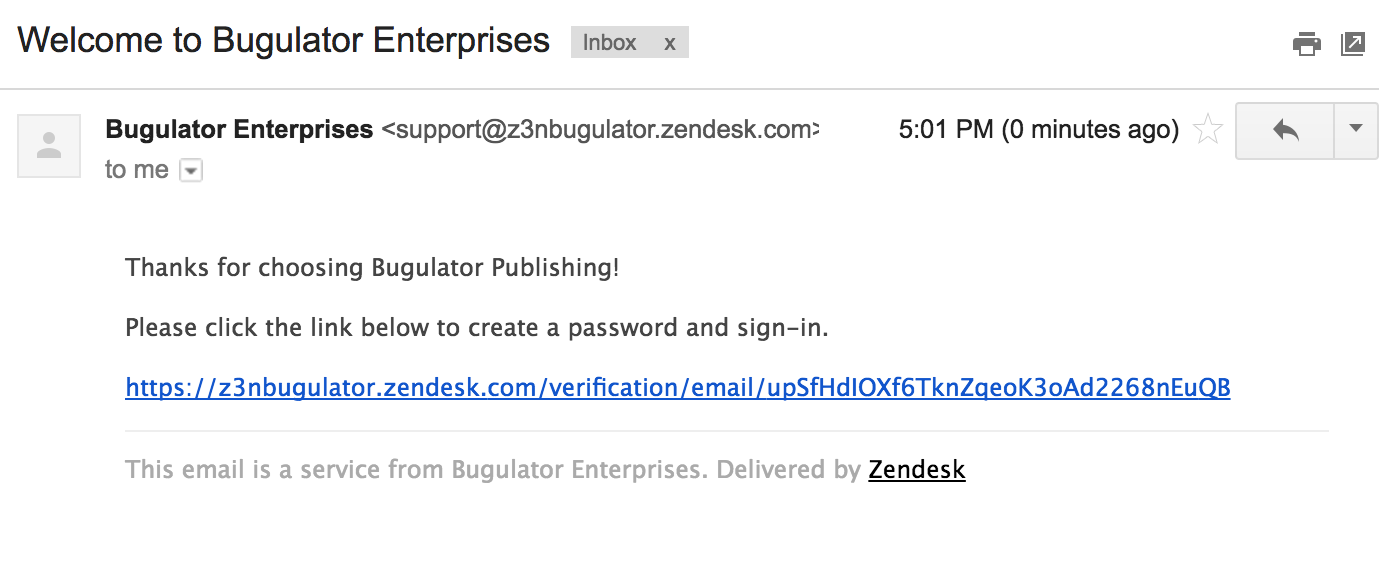
After signing up, end-users receive a welcome email message that prompts them to verify their email address and also create a password so that they can sign in to Zendesk Support.

Important: When you require your end-users to register, any requests that they submit to Zendesk Support before registering are sent to the suspended tickets view; they are not added as tickets in your Zendesk Support instance. Once the end-user has verified their email address, their future requests will create tickets. Their previous requests must be recovered from the suspended tickets view.
By requiring your end-users to register, you help to ensure that the support requests you receive are legitimate and not spam. Registration is not a guarantee that spam won’t get through to your Zendesk, but other tools are provided to handle those that do manage to get through. See Understanding and managing suspended tickets and spam.So what does the end-user gain by registering and signing in to your Zendesk Support instance? Doing so allows the end-user to do the following:
- Submit tickets in Help Center without being prompted to provide their email address
- Track their tickets in Help Center
- Comment on articles in Help Center, participate in community discussions, and more. See Getting Started with Help Center
- Update their user profile and add additional contact information (email addresses and social media accounts) so that they can submit requests from any of these accounts and Zendesk will pair them to their Zendesk user account.
Note: End-users must allow third party cookies in their browser to be added as a new user when using an incognito or private window.
Allowing unregistered users to submit requests
You can still provide support to your end-users without requiring them to register and sign in. They lose the benefits that registration provides but as far as your agents are concerned, the ticket workflow is the same. Many companies provide email-only support and never require their end-users to register because they don’t want or need their end-users to visit and use their Help Center.Note: You can actually do both: not require registration and also allow your end-users to use your Help Center. You’d do this by hiding all the sign-in access points into your knowledge base and then providing content that anyone can see. For more information about setting this up, see Setting up to provide email-only support.
Even though you don’t require your end-users to register, a user account is created for each of them in your Zendesk. This is required of course because Zendesk (and you) need to communicate with them via email. The user account contains their email address and other personal data. These users remain unverified in your Zendesk, which is fine since you don’t require registration.
When unregistered users submit a support request, they receive an email notification informing them that their request has been received. They do not receive the new user welcome email message. And, unlike when requiring registration, the ticket is immediately added to your Zendesk Support instance.
See Managing end-user settings for more information about setting up your Zendesk Support instance to allow unregistered users.
End-user accounts created by agents
As we’ve shown above, there are a number of ways that your end-users can self-register in your Zendesk. In addition to self registration, your agents can also add end-users.
This can be done manually by agents. Administrators can bulk import a list of users using a CSV file or add users via the Zendesk API.
If you require registration, you can choose if you want the welcome email message sent to the end-users you’ve added. This is an admin setting called Also send a verification email when a new user is created by an agent or administrator. Choosing this setting prompts the end-users to verify their email and choose a password just as if they had created the user account themselves (in other words, to register with your Zendesk). If you don’t require registration, you would not choose this option.
How you set up Zendesk Support (as open, closed, or restricted) also affects registration, verification, and passwords. For detailed information, see the following topics:
- Enabling anyone to submit tickets (open)
- Permitting only added users to submit tickets (closed)
- Permitting only users with approved email addresses to submit tickets(restricted)
Sign-in
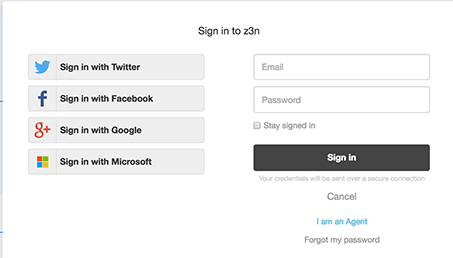
If you’ve decided that your end-users must sign in to access Zendesk Support, you need to decide how you want to authenticate your end-users so that you’re assured that they are who they say they are. Zendesk provides lots of flexibility in this regard. You can use Zendesk’s own user authentication (the standard sign in process) or you can remotely authenticate your end-users outside of Zendesk and then seamlessly sign them in to your Zendesk Support instance. You can also allow your end-users to sign in using popular social media such as Facebook, Google, and Twitter.
When discussing users that are authenticated outside of your Zendesk, you’re going to see these terms: single sign-on (or SSO) and remote authentication. Single sign-on is often used interchangeably with remote authentication. For the sake of clarity, it’s best to think of single sign-on as the ability for your users to sign in to your Zendesk Support instance using a password from a system outside of Zendesk. That’s made possible by remote authentication; users are authenticated outside of your Zendesk and then seamlessly signed in.
Standard Zendesk sign-in
This is the user authentication that Zendesk provides and which was outlined above. You set your Zendesk account to require registration, the end-user signs up (registers) and then verifies their email address and creates a password. They then sign in to your Help Center using their email address and password. Zendesk takes care of authenticating the user and allowing them access to your Zendesk. You also have the option of setting the security level for passwords. All user data is contained and managed within your Zendesk account.
2-factor authentication can be turned on for agents and administrators on an individual basis. After entering their password as usual, they’ll be asked to enter a 6-digit passcode. The passcodes can be received in text messages or they can be generated by a two-factor authentication app installed on a mobile device.Note: If an end-user or agent fails to enter their password correctly ten times in a row, they are locked out and cannot sign in again until they reset their password.For more information, see the following:
Social media single sign-on: Facebook, Google, Twitter
In addition to the end-user’s Zendesk user account sign-in (email address and password), you can allow your end-users to sign in to your Zendesk Support instance using their Facebook, Google, Twitter accounts.

These social media sign-in options are provided as a convenience for your end-users so that they don’t need to remember yet another password to sign in to your Zendesk.
The social media account, rather than Zendesk, is authorized to authenticate the end-user. Zendesk trusts Twitter, for example, to make sure that the user is who they say they are.Note: Both Facebook and Twitter are also Zendesk Support channels, meaning that end-users can reach out to you using either of these, if you’ve set up these channels in Zendesk Support. Support requests received via these channels is not the same as signing into your Zendesk Support instance. In other words, enabling the Facebook or Twitter social sign-in is not the same as enabling these as channels in Zendesk Support.
For more information, see Enabling social media single sign-on.
Single sign-on with JSON Web Token (JWT)
You also have the option of creating a locally hosted custom remote authentication script that connects to your external user management system. This is possible using JSON Web Token (JWT). Single sign-on is based on a shared secret between your local authenticating script and Zendesk. This secret is used to securely generate a hash (one-way encryption) that Zendesk uses to ensure that users who sign in to your account using remote authentication are who they claim to be and have been pre-approved to do so by implicitly knowing the shared secret. JWT is available on Team and above.
For more information about JWT, see Setting up single sign-on with JWT (JSON Web Token).
Single sign-on with SAML (Professional and Enterprise)
If you prefer to manage your users and their sign-in to your Zendesk yourself, you have the option of using identity provider services such as OneLogin, Okta, and PingIdentity. These use SAML (Secure Assertion Markup Language) and either store all your user data or connect to your enterprise user management systems such as Active Directory and LDAP.
You might set up your Zendesk sign-in this way if you’re using Zendesk Support as corporate IT help desk, for example. You have complete control over your users and they don’t need a separate password to sign in to your Zendesk. Instead, when users visit your Zendesk Support instance and attempt to sign in, they are seamlessly redirected to your SAML server for authentication. Once authenticated, users are redirected back to your Zendesk Support instance and automatically signed in.
The only user data that is contained in your Zendesk is the user’s email address or an external ID that you define.
For more information about setting up your Zendesk to use a SAML identity provider, see Using SAML for single sign-on (Professional and Enterprise).
