In October 2017, popular SMTP plugin Postman SMTP, with 100k+ active installs, was removed from the WordPress repository due to an XSS vulnerability.
This news spread like wildfire. The plugin had not just been removed because of the vulnerability – it had also not been updated in the last sixteen months, making it incompatible with the latest release.
Some security researchers even tried, unsuccessfully, to contact the plugin’s author. While Jason Hendriks, the man behind the plugin, had created an excellent tool for WordPress users, he was unable to maintain the plugin later.
As a WordPress developer and active user of Postman SMTP, I decided to fork the plugin so that all of Jason’s hard work didn’t just end up in the bin. I have named the fork “Post SMTP Mailer/Email Log”, and you can get it from the WordPress repository. Within a few days, the Post SMTP plugin got more than thousands of active installs and now the plugin has more than 200,000 active installations.
Let me take you to a step-by-step guide on setting up the Post SMTP WordPress plugin with Gmail/Google Apps and 0Auth so that Postman SMTP users and others can set it up properly.Table of Contents
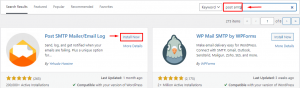
Step 1: Install Post SMTP Plugin
Download and install Post SMTP directly from the WordPress plugin repository.
Step 2: Activate Post SMTP Plugin
After installing and activating the plugin, you will see a message inviting you to start configuring the plugin. Click on Settings.

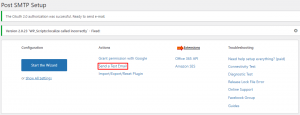
Step 3: Troubleshooting Screen
This is the main screen of the WordPress Post SMTP plugin. To power the plugin, I have also introduced the handy troubleshooting screen on the right.
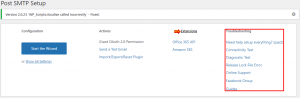
Step 4: Start The Wizard
Click on the “Start The Wizard” button, and enter your Email Address and Name.
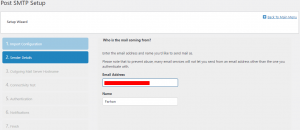
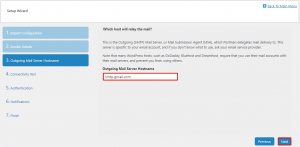
Step 5: Gmail SMTP Server
Within a few moments, the plugin will auto-resolve the Gmail SMTP server. After that, click on the Next button.
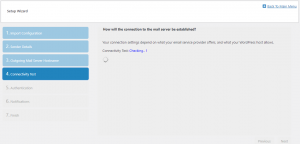
Step 6: Run Connectivity Test
The wizard will run a Connectivity Test and after that, you will see the connection screen.
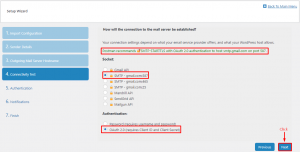
Step 7: Connect to Mail Server
The wizard will automatically recommend and select: SMTP-STARTTLS with OAuth 2.0 authentication to host smtp.gmail.com on port 587. Then simply click Next.
Step 8: Client ID and Client Secret
In the Authentication screen, you will need to input two parameters: Client ID and Client Secret to configure it.

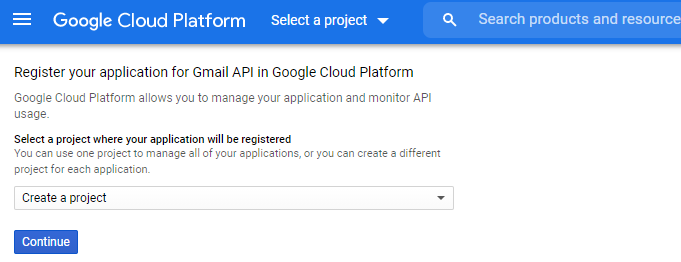
Step 9: Gmail API in Google API Console
To get the Client ID and the Client Secret, visit Google API Console and log in to your Gmail Account if asked. If it’s for the first time then you need to register your application for Gmail API, or simply Create a project and click Continue.
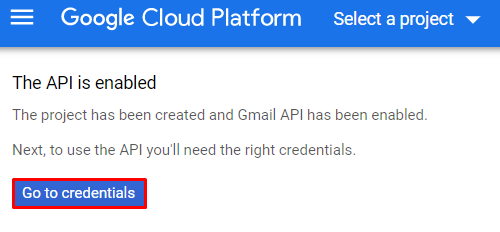
After a few seconds, the next screen will appear. Click Go to credentials.
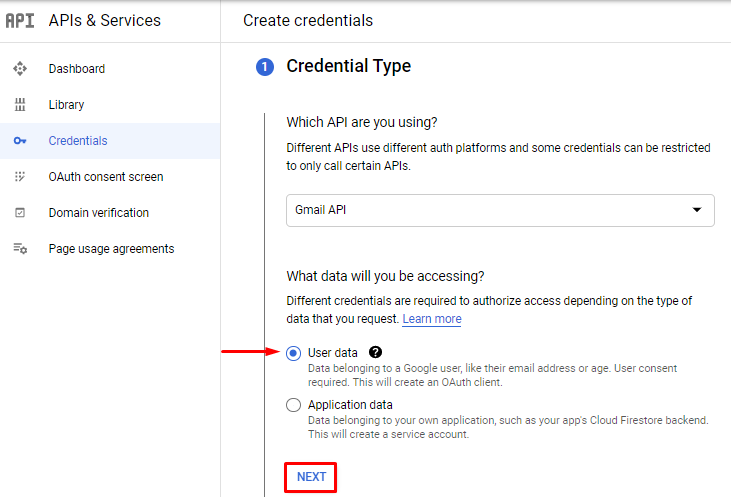
Step 10: Create Credential Type
Next in the process is to create credentials for SMTP configuration. Select User data and click NEXT.
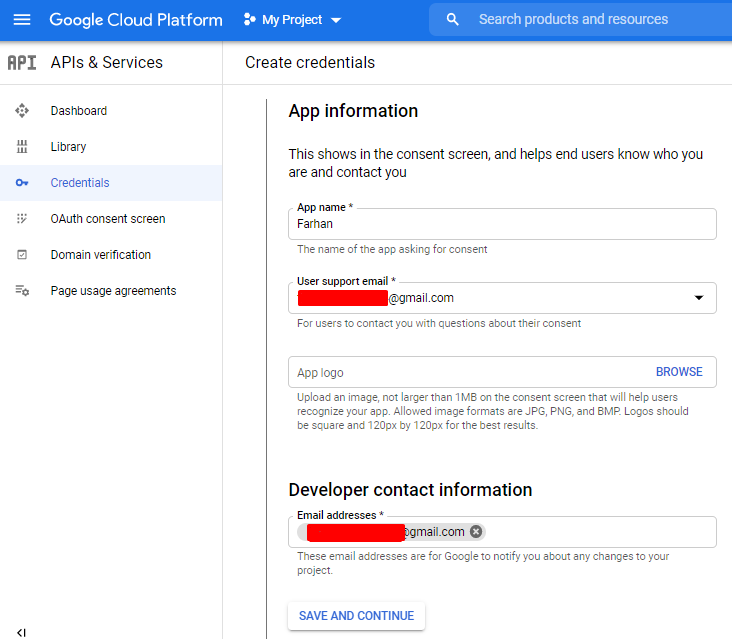
Then, provide the app information like your App Name, User Support Email, and Developer Email Address, and click SAVE AND CONTINUE.
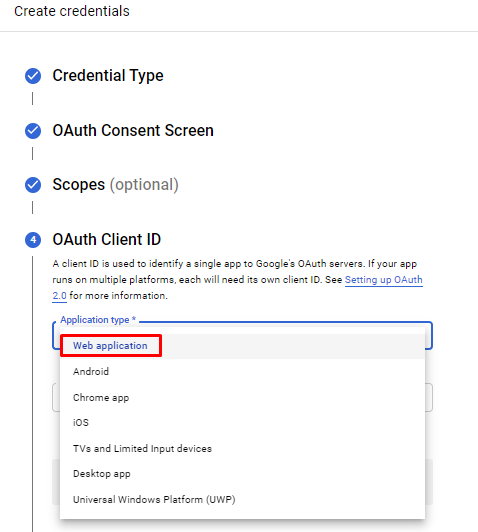
You can skip the next step (Scopes) as it’s an optional step and continue with the OAuth Client ID, where you need to select Web application as the application type.
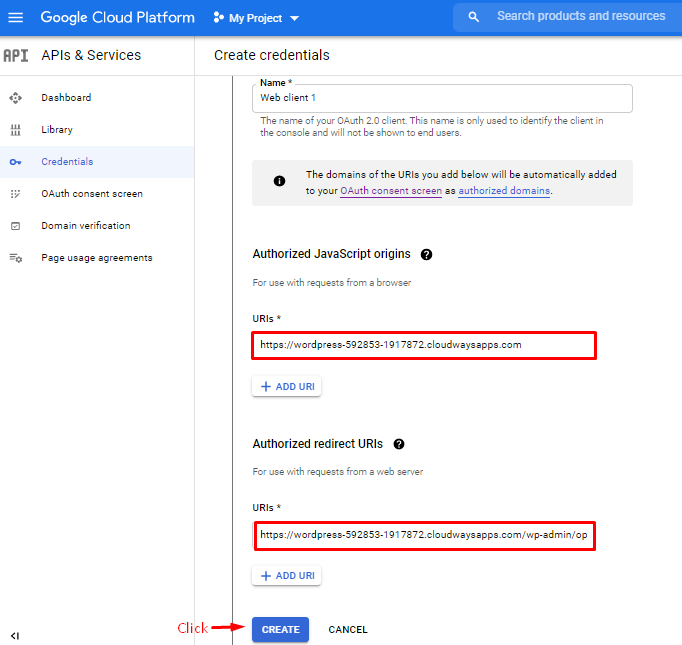
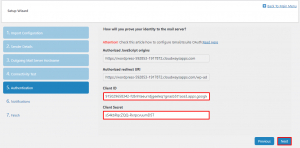
Scroll down the screen and click ADD URI. Paste the Authorized JavaScript Origins URI and Authorized Redirect URI from the plugin Setup Wizard (step 8) to the particular URI field and click Create.
Now, you have successfully completed all the steps. You can download your credentials if you wish. Click Done.

Step 11: Add Copy Client ID and Client Secret
Now copy the Client ID and Client Secret and paste them into the plugin Setup Wizard (step 8). Click Web Client 1 (OAuth name) to access your Client ID information.
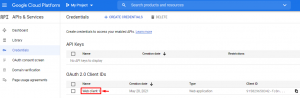
Once you click on the name, you will find the Client ID and Client Secret of your Gmail account that you need to copy.
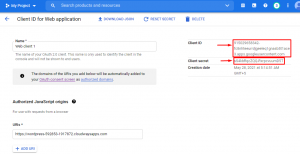
Next, you need to paste the Client ID and Client Secret to the plugin setup (step 8) and click Next.
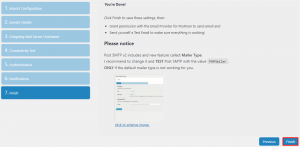
Then, skip the notification step and finish the setup.
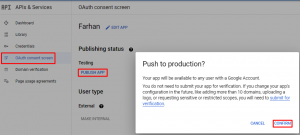
Step 12: Grant Permission with Google
Before you grant permission to your account, change the publishing status from Testing to Publishing. For that, go back to your Google console > OAuth consent screen > Publish App and click Confirm.
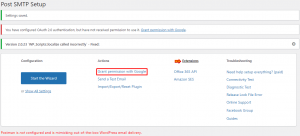
Now get back to your WordPress dashboard > Post SMTP Setup and click Grant permission with Google.
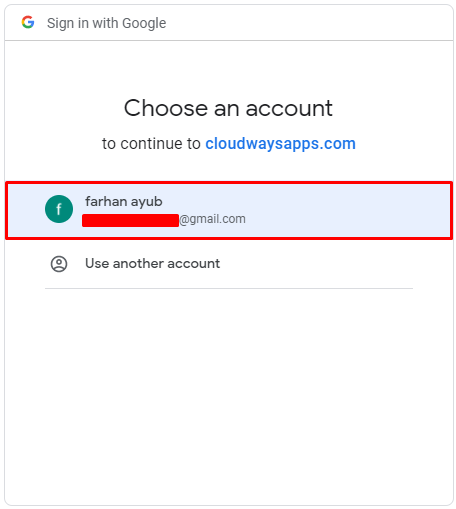
From the dialog box, select the Gmail account you want to use to send emails, and allow all the permissions.
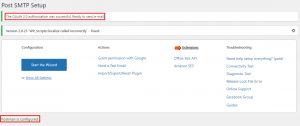
To verify you configured everything correctly, just check that your status matches this one.
Step 13: Send a Test Email
The last step is to check and verify that everything is working as expected. Click Send a Test Email option from the Actions section and enter the destination email.
If everything is configured properly, you should get an email like this one.

Final Words!
I hope this article helped you learn how to set up and configure post SMTP on WordPress for free. This is a step-by-step guide where I’ve covered thirteen steps to demonstrate the process.