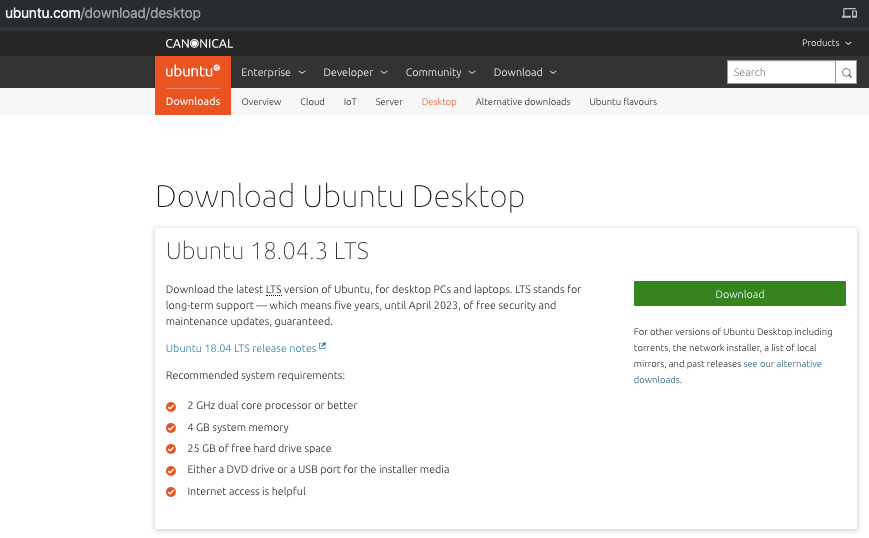
Pre-requirements
- VirtualBox v6
- Download the Ubuntu 18.04 LTS image,
- Go to https://ubuntu.com/download/desktop,
- Download `Ubuntu 18.04.3 LTS`,
- Save as `ubuntu-18.04.3-desktop-amd64 .iso`
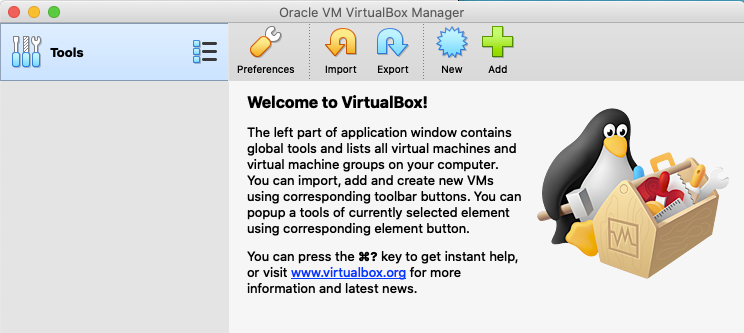
2. Create an Ubuntu VM in VirtualBox
- Open VirtualBox,
- Click the
Newbutton,
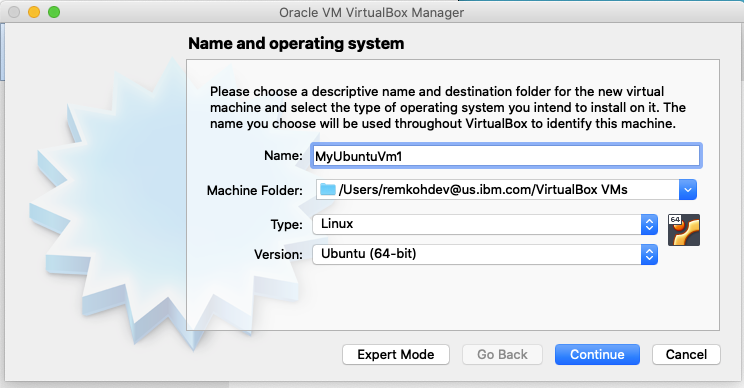
- Name the VirtualMachine ,
- For
TypeselectLinux, - For
VersionselectUbuntu (64-bit), - Click
Continue,
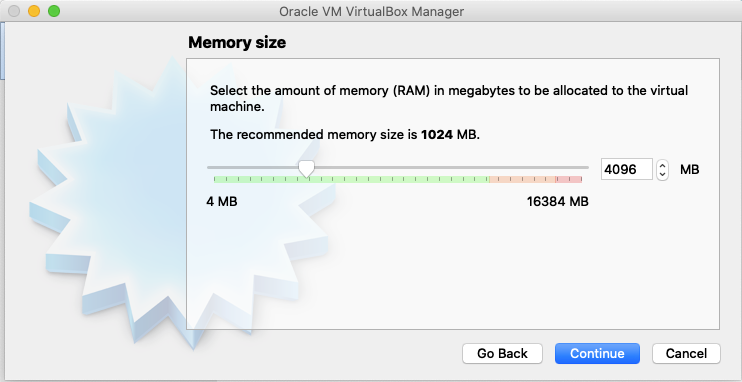
- Increase
Memory sizeto 4096MB, - Click
Continue,

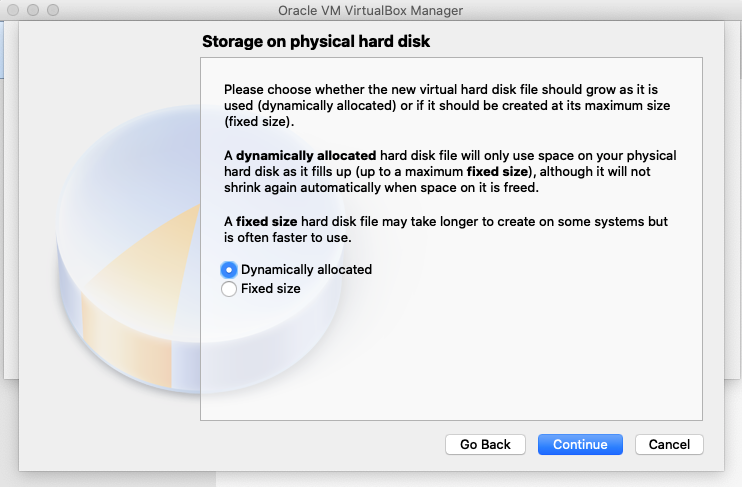
Create a virtual hard disk now,- Click
Create,
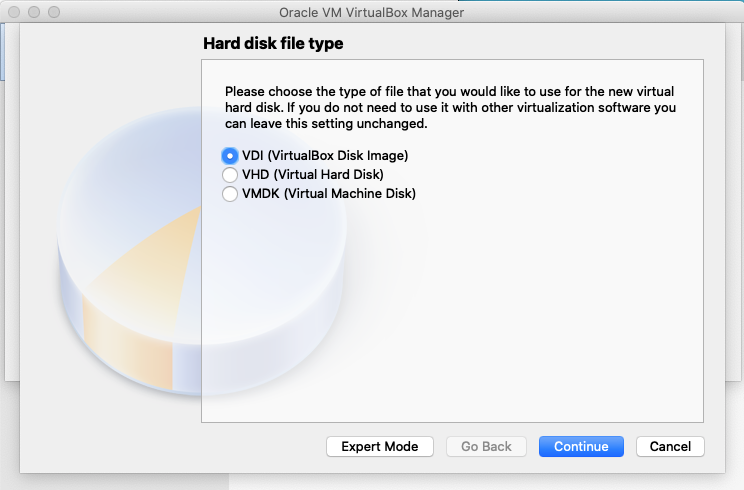
- Select
VDI (VirtualBox Disk Image), - Click
Continue,
- Click
Continue,
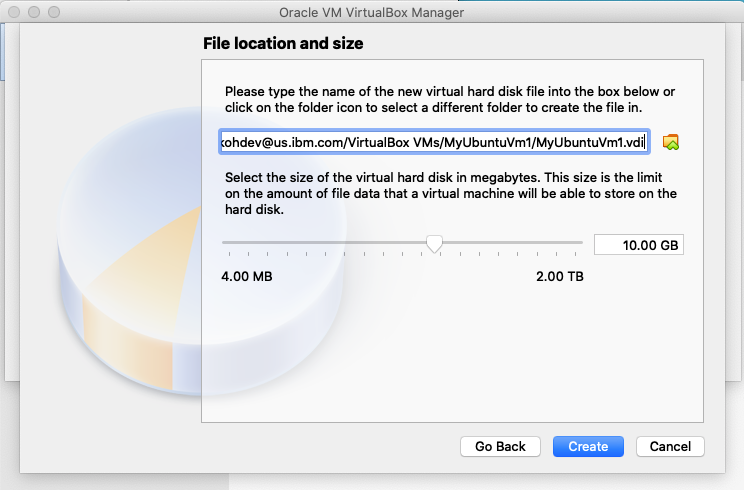
- Click
Create,
2. In the Ubuntu VM guest machine, go to Settings:
- Go to Network:
- Go to `Adapter 1` and add port forwarding by:
- Check
Enable Network Adapter, - Attached to: NAT
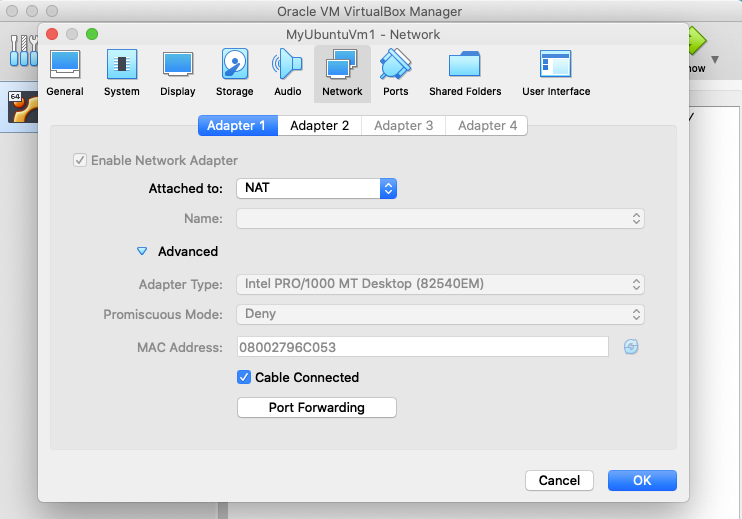
- Advanced > Click
Port Forwarding, - Add a new
Port Forwardingentry, - For
NameenterSSH, - For
ProtocolenterTCP, - For
Host IPenter127.0.0.1, - For
Host Portenter5679, - For
Guest IPenter10.0.2.15, - For
Guest Portenter22,
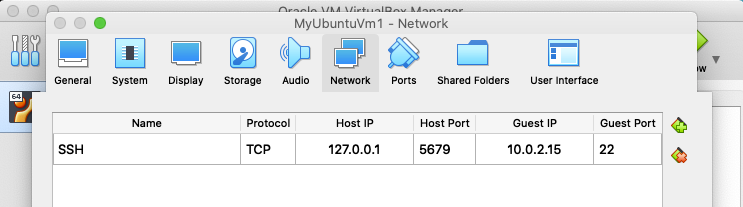
- Click
OK, - Go to Network:
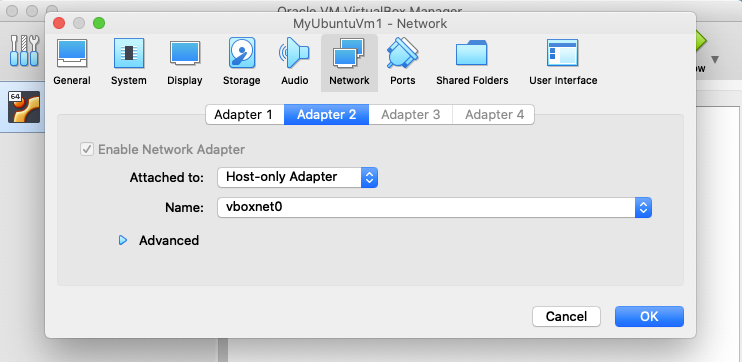
- Go to `Adapter 2` and add a new adapter:
- Check
Enable Network Adapter, - Attached to: Host-only Adapter
- Name: vboxnet0
- Go to System:
- Under
Boot Ordercheck theNetworkoption, - Under the
Extended Featurescheck `Enable I/O APIC` ,
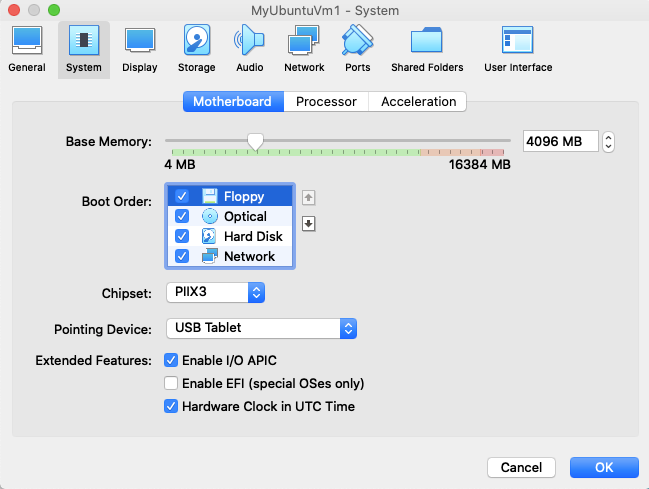
- Click
OK,
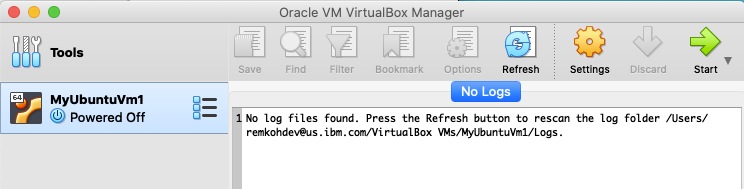
3. Start the Ubuntu VM guest called MyUbuntuVm1, get the guest IP address,
- Select the image
MyUbuntuVm1, - Click
Start, - Select
Normal Start, - Select a virtual optical disk image file that you downloaded as `ubuntu-18.04.3-desktop-amd64.iso`,
- Browse to the `ubuntu-18.04.3-desktop-amd64.iso` file,
- Click
Open, - Click
Start, - Click `Install Ubuntu`,
- Select
English(UK)and clickContinue, - Select
Minimal Installationand clickContinue, - Select
Erase disk and install Ubuntu, and clickInstall Now, - Click
Continue, - Set your timezone, e.g.
New York, - Click
Continue, - Add the admin user and click
continue, - The installation will start,
- Click
Restart Nowwhen the installation is complete, - Press
ENTER, - Restart the VM,
- Login with the created user credentials,
- Install the SSH Server,
- Open a Terminal,
$ sudo apt-get install openssh-server
$ sudo service ssh status
- Get the IP address on your VM instance,
- Get the IP address of the VM Guest,
$ ip addr show
...
2: enp0s3: ...
inet 10.0.2.15/24 brd 10.0.2.255 ...
...
3: enp0s8: ...
inet 192.168.99.104/24 brd 192.168.99.255 ...
...
4. On your host, get the host IP address,
- Open a terminal or console window,
- On a Mac, use `ifcongif`,
$ ifconfig
en0: ...
    ...
    inet 192.168.1.3 ...
    ...
vboxnet0: ...
    inet 192.168.99.101 netmask 0xffffff00 broadcast 192.168.99.255
    ...
- Note the discrepancy between the VM Guest IP and the IP address for vboxnet0 retrieved on your VM Host. You can correct this in the next step.
- Power off the VM,
- Confirm to
Power Off,
5. Configure Adapter,
- To make sure the vboxnet0 IP address on the local host has the same IP address as the Ubuntu VM guest you found, go to VirtualBox > File > Host Network Manager,
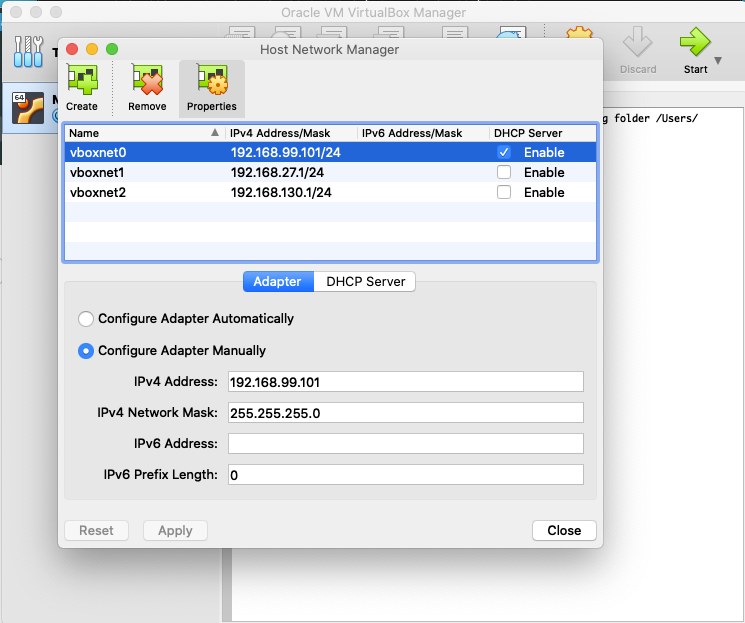
- go to `Configure the Adapter Manually` and set the `IPv4 Address` to the IP address of the Ubuntu VM guest, e.g. change the detected IP value for vboxnet 192.168.99.101 to the actual vboxnet0 you found in the guest VM of 192.168.99.104.
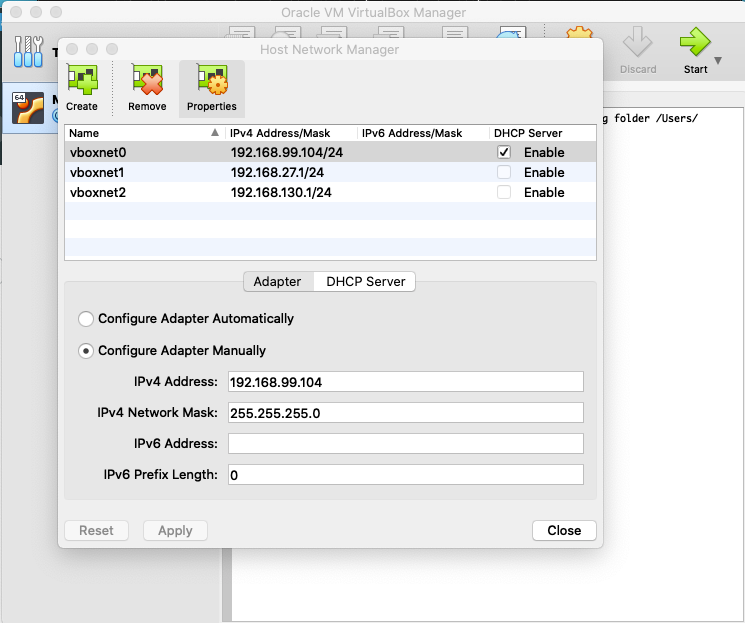
- Click
Apply, - Click
Close, - Start the VM again,
6. Open a terminal on the VM Host, your local machine, and ssh in to the guest,
$ ssh [email protected] -p 5679
[email protected]’s password: ********
Welcome to Ubuntu 18.04.2 LTS (GNU/Linux 4.18.0–15-generic x86_64)
...
Last login: Sun Jul 28 22:00:21 2019 from 10.0.2.2
user1@user1-VirtualBox:~$
- If you get the following warning and error,
$ ssh [email protected] -p 5679
@@@@@@@@@@@@@@@@@@@@@@@@@@@@@@@@@@@@@@@@@@@@@@@@@@@@@@@@@@@
@    WARNING: REMOTE HOST IDENTIFICATION HAS CHANGED!     @
@@@@@@@@@@@@@@@@@@@@@@@@@@@@@@@@@@@@@@@@@@@@@@@@@@@@@@@@@@@
Offending ECDSA key in /Users/you/.ssh/known_hosts:28ECDSA host key for [127.0.0.1]:5679 has changed and you have requested strict checking.Host key verification failed.
- Edit the file `/Users/you/.ssh/known_hosts` and remove the IP address entry,
- To read more about VirtualBox networking and the VMs IP addresses, read Oracle VM VirtualBox: Networking options and how-to manage them.
- Exit the guest to return to the host terminal,
$ exit
logout
Connection to 127.0.0.1 closed.