Follow the steps below to set up SPF and DKIM for Mailchimp, so that your marketing emails are more likely to reach the inbox. This is a process also known as email domain authentication.
How to set up SPF and DKIM for Mailchimp:
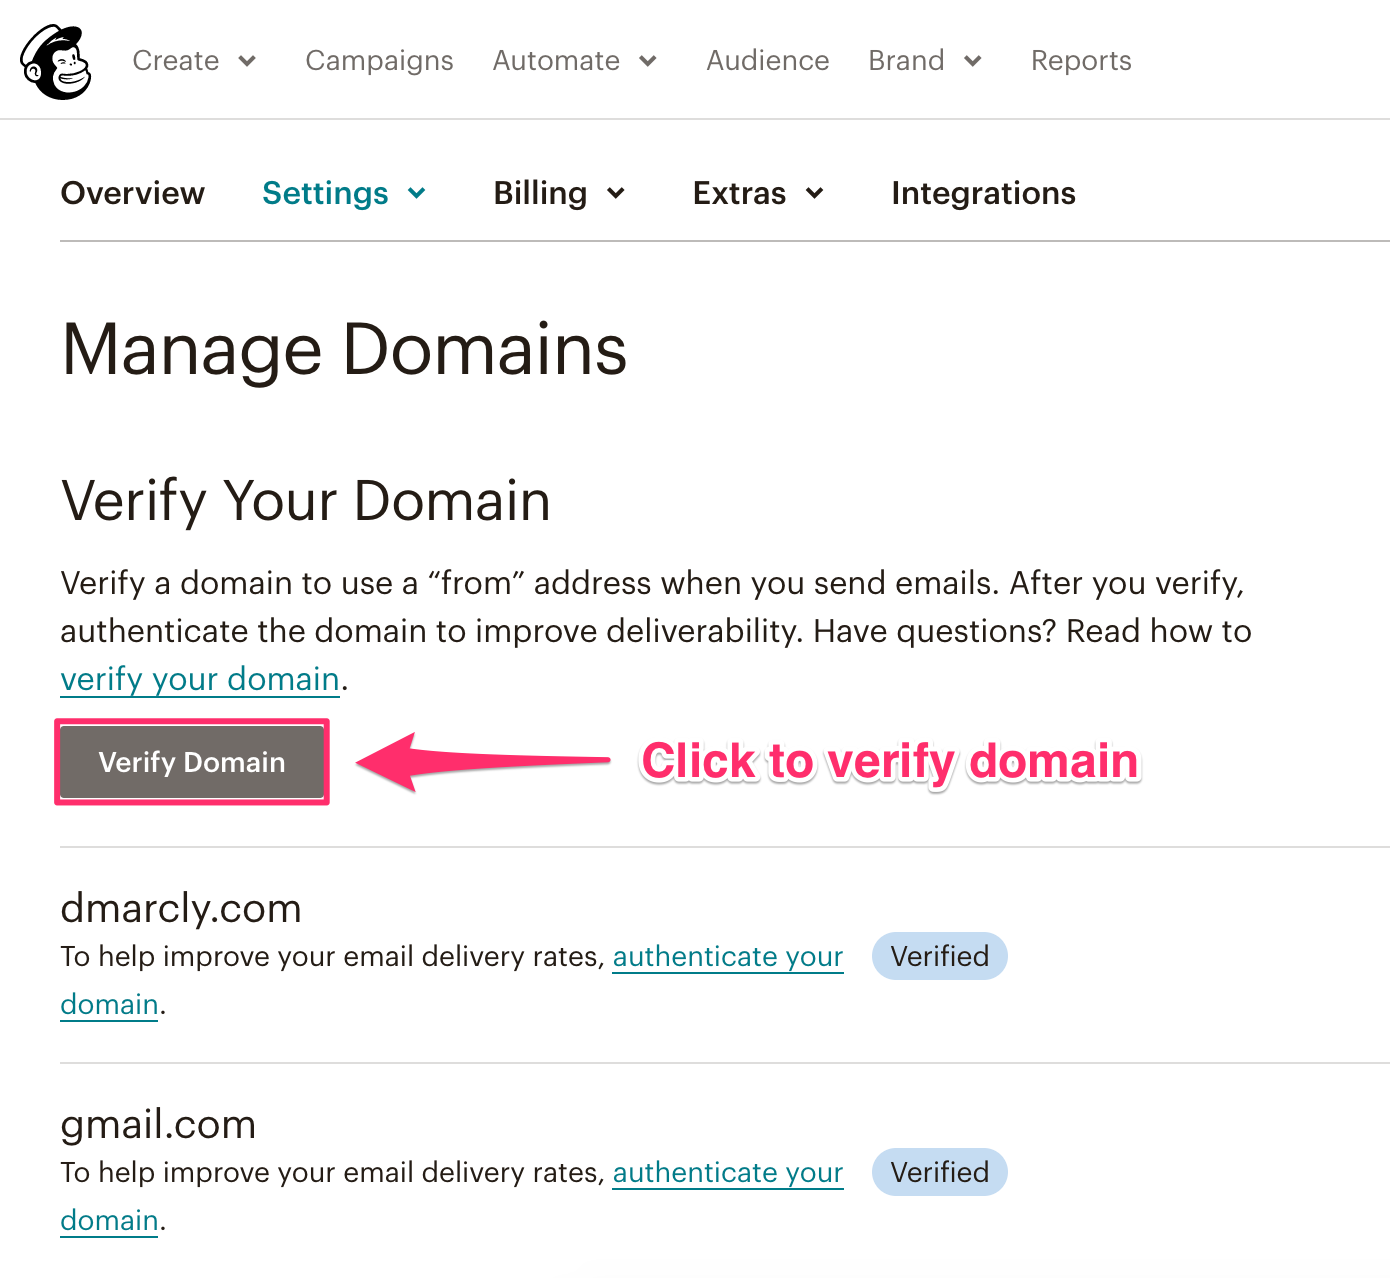
- Verify your domainMailchimp requires you to verify that you own the domain before you can authenticate (setting up SPF and DKIM) it.To verify your domain, log in to Mailchimp. Go to Account -> Settings -> Domains, then click on the Verify Domain button, as highlighted below:
 A modal pops up prompting you to enter an email address that contains your domain:
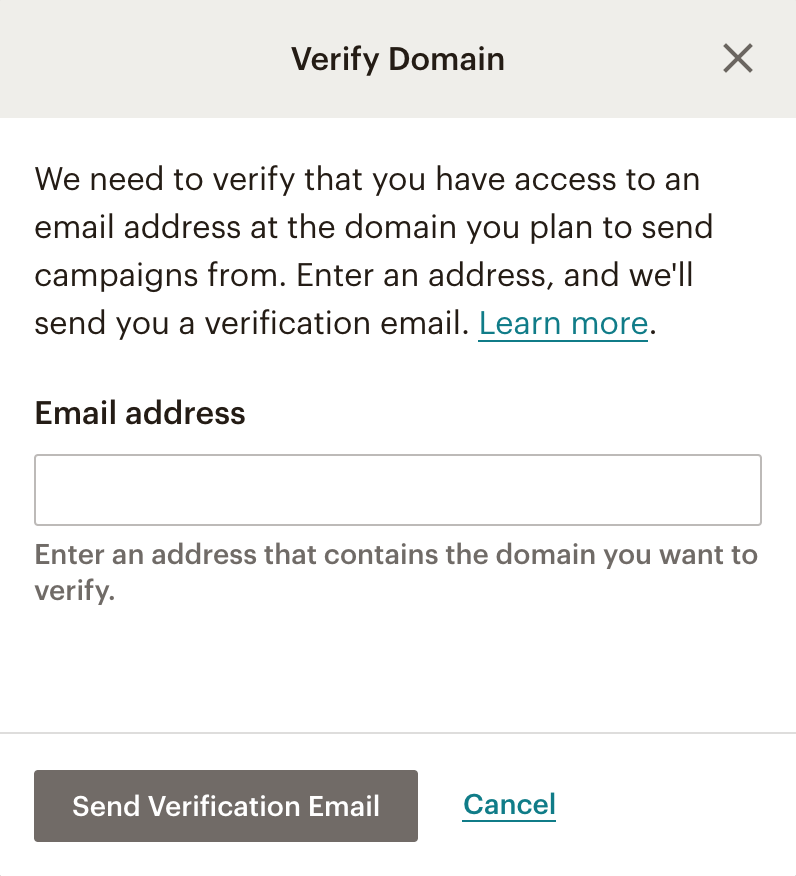 For example, if you want to verify yourdomain.com, you need to enter some valid email you have access to like [email protected]. Enter the email address in the input box, then click on the Send Verification Email button.Once the email shows up in your inbox, click on the Verify Domain Access button in the email:
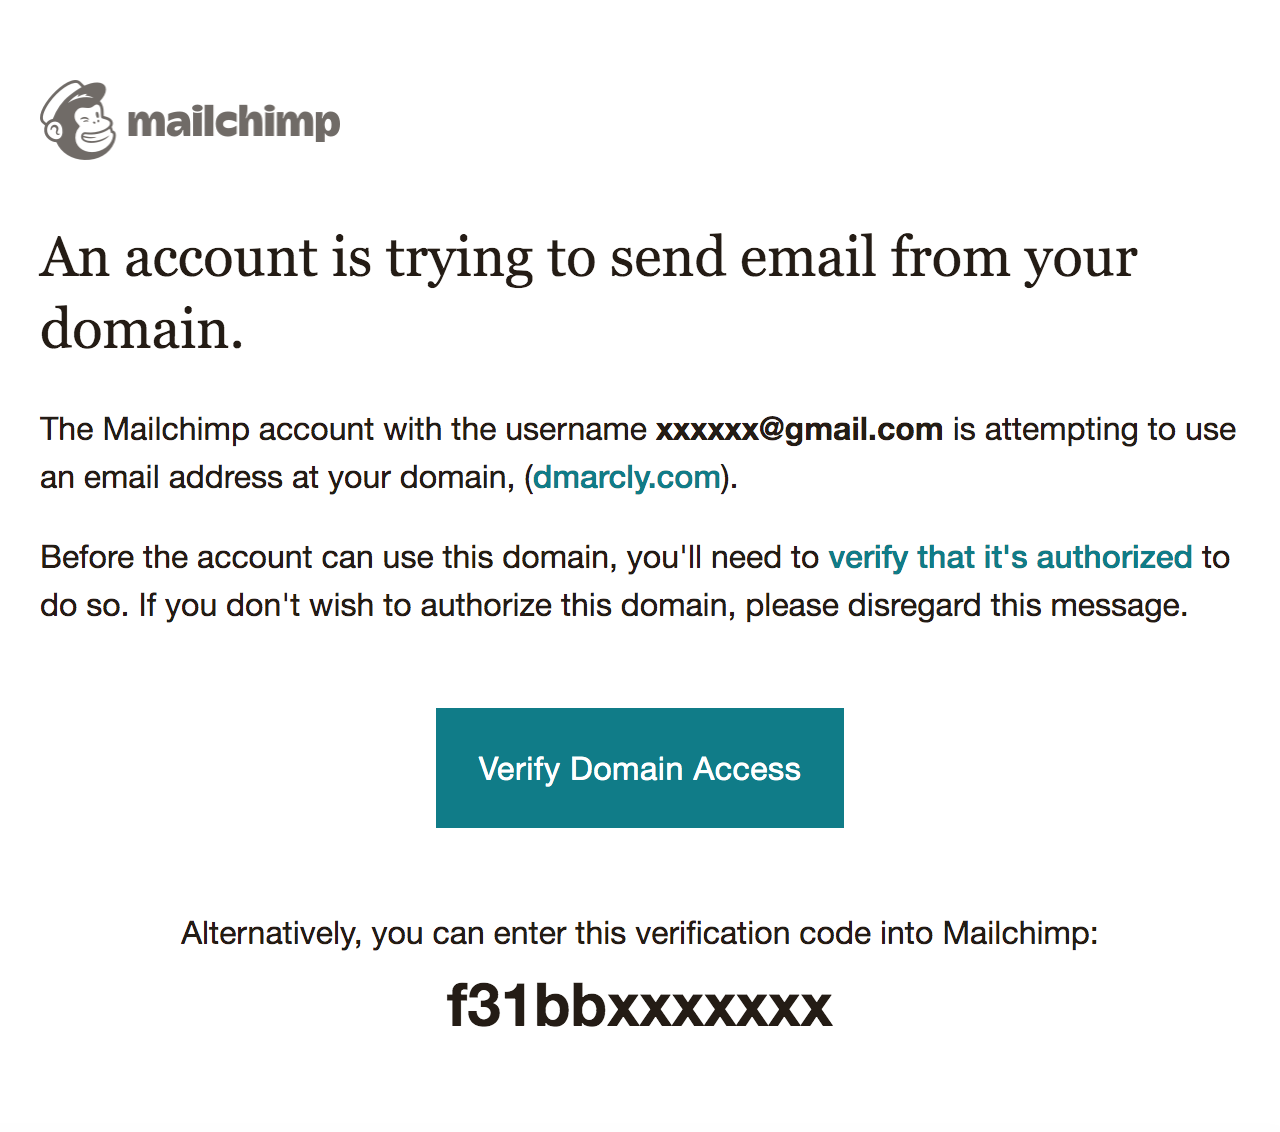 Now the domain is verified.
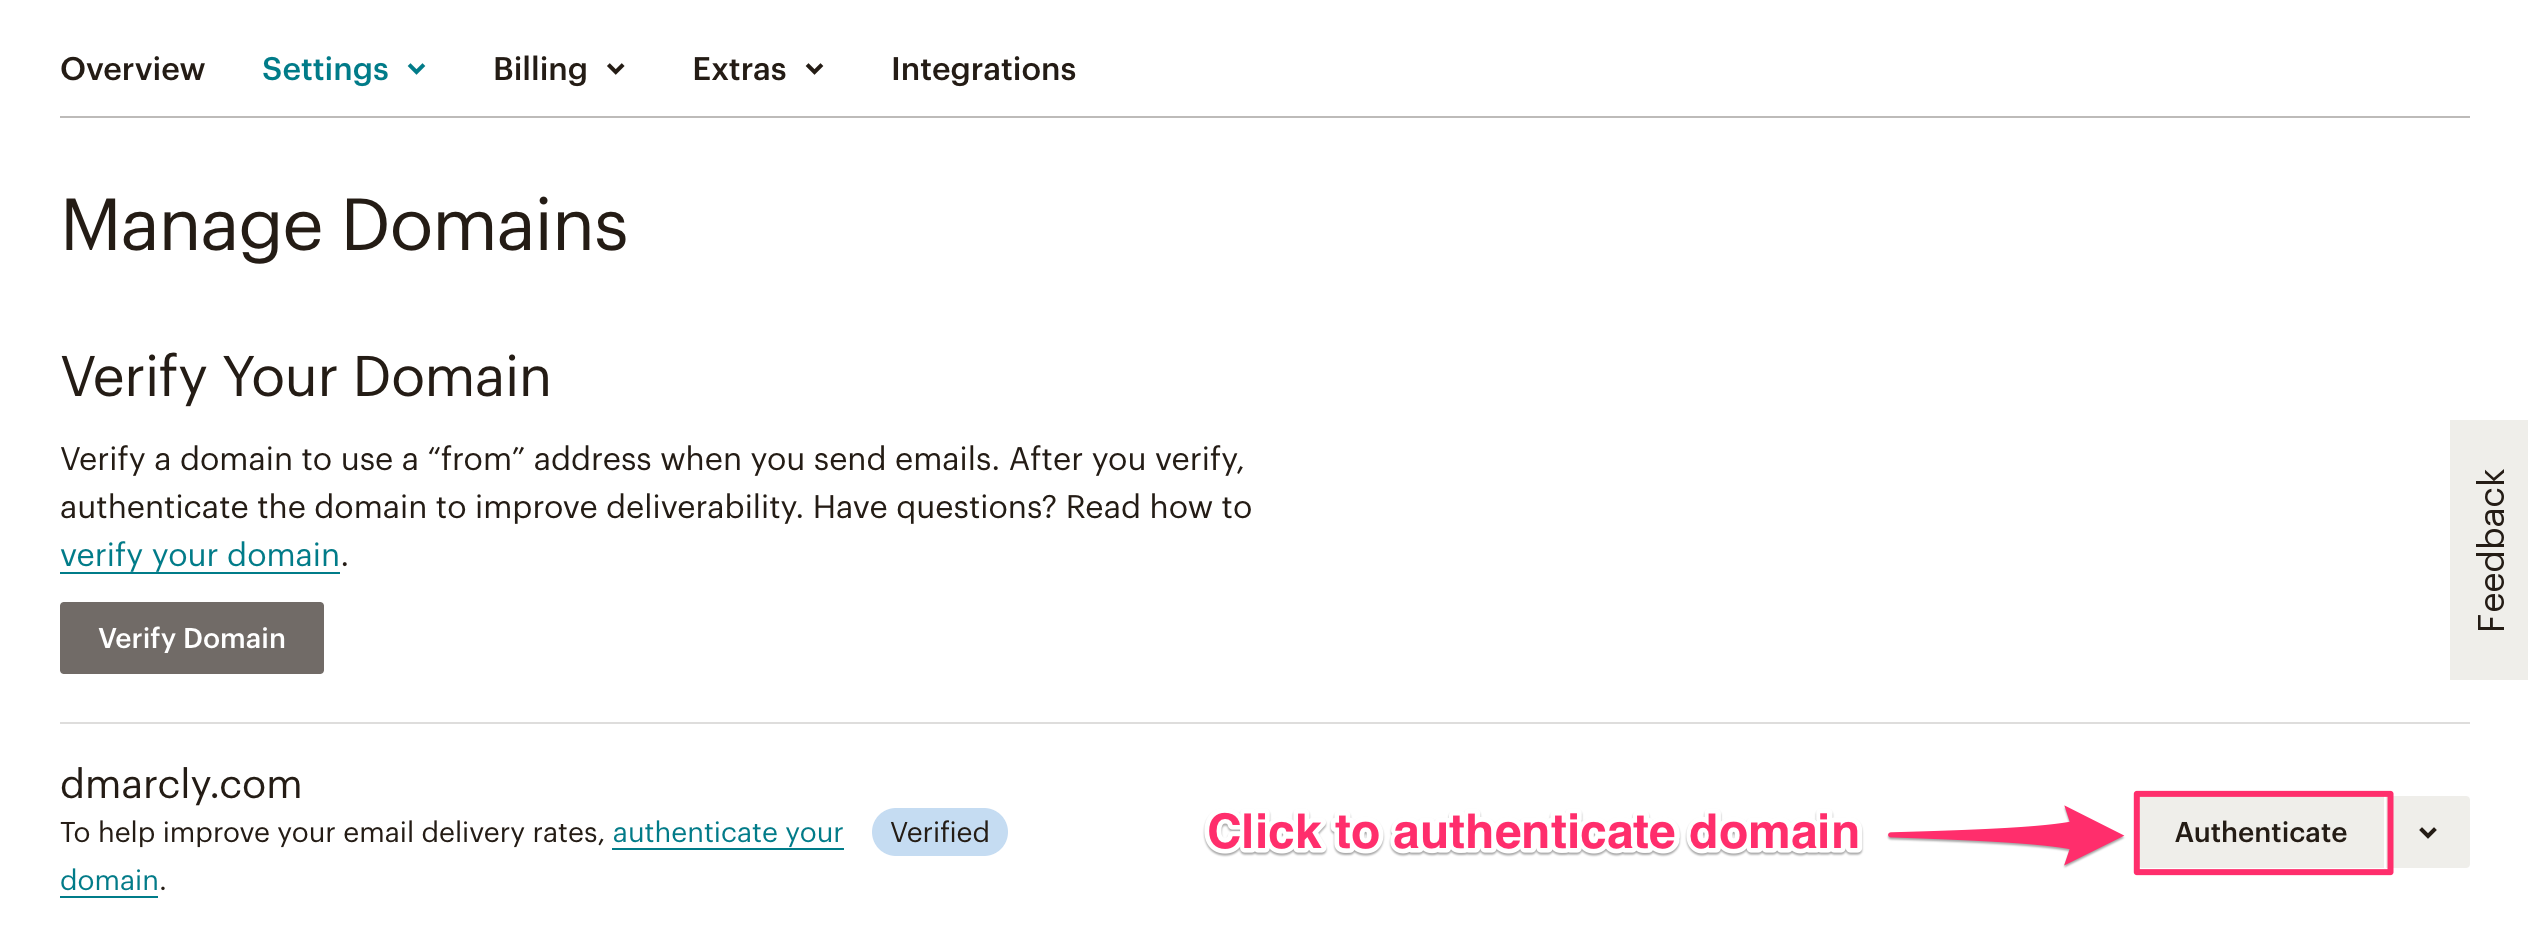
 - Set up SPFNext let’s set up SPF. Setting up SPF and DKIM on your domain is also known as “domain authentication” and “authenticate your domain”.Authenticating a domain for Mailchimp means you, as the domain owner/administrator, authorize Mailchimp to send emails on behalf of that particular domain.Authenticating a domain has 2 benefits:
- emails sent by Mailchimp on behalf of your domain appear to come from your domain, instead of from Mailchimp servers;
- such emails have a better chance to reach the inbox.
 A modal that contains both SPF and DKIM settings appears:
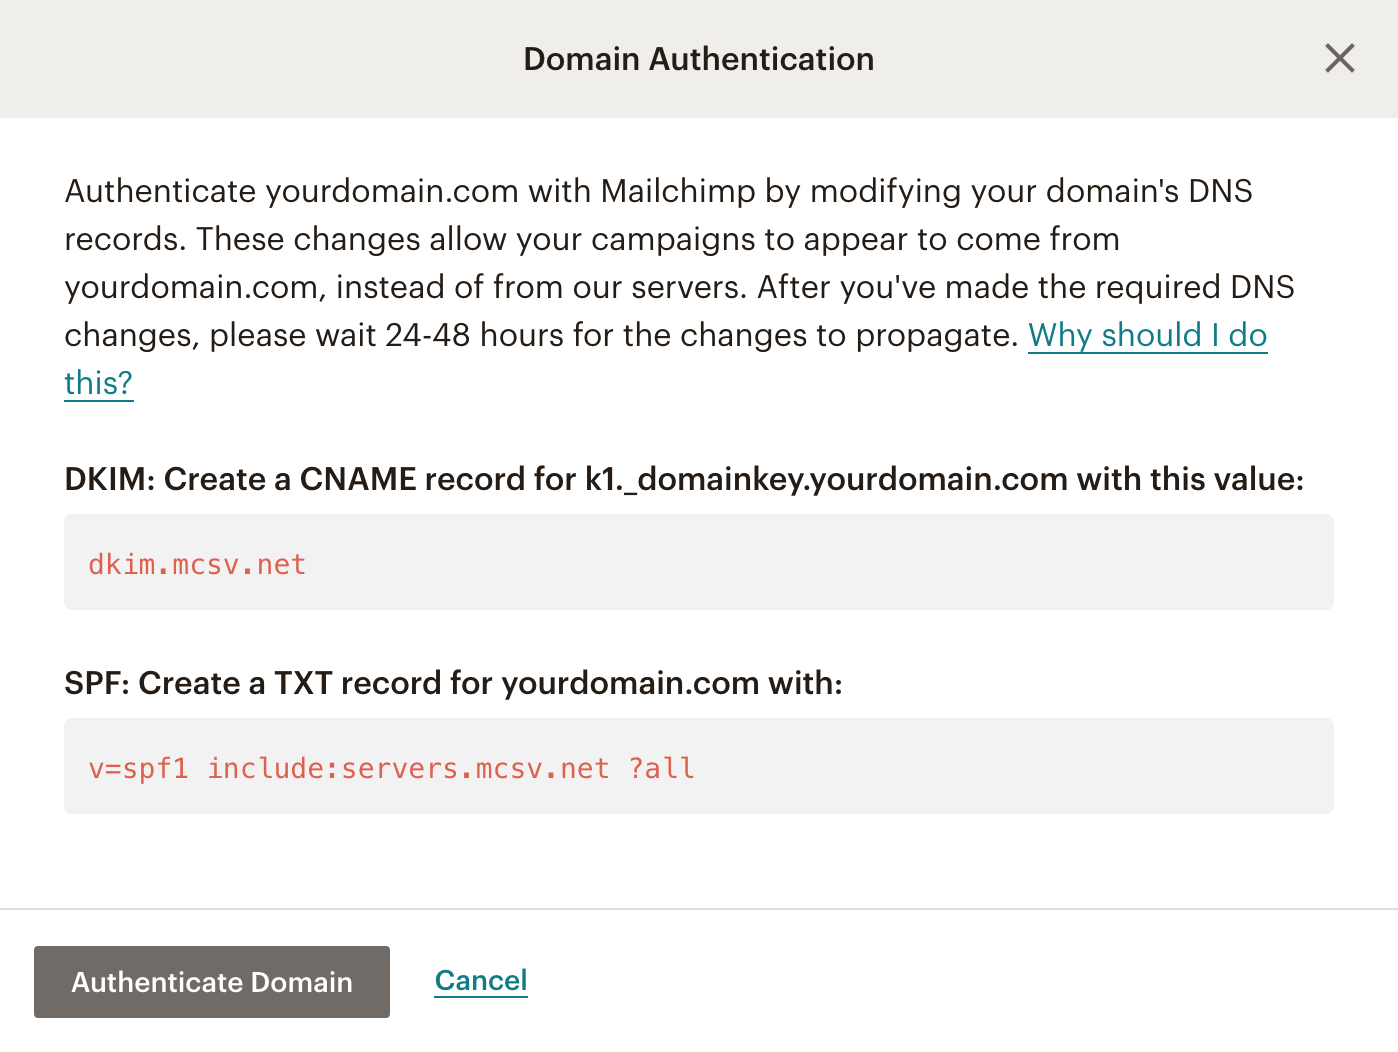 You need to create a new SPF record or update your existing SPF record on your domain:
- if you have no SPF record on your domain, simply publish the following SPF record on it:
v=spf1 include:servers.mcsv.net -all - if you already have an SPF record, simply insert
include:servers.mcsv.netright before the terminating mechanism in that record. For example, if your current SPF record looks like this:v=spf1 a -allupdate it to:v=spf1 a include:servers.mcsv.net -all
- Set up DKIMThe modal in the SPF setup section contains DKIM as well. It tells you to create a CNAME record for k1._domainkey.yourdomain.com with this value:
dkim.mcsv.netThe complete record looks like this:Record TypeNameValueTTLCNAMEyourdomain.comdkim.mcsv.netDefault
Once you’ve set up both SPF and DKIM, click on the Authenticate Domain button in the modal to complete the process.